Whenever I work with a company that’s not using MailChimp to deliver its email campaigns, I want to die a little inside. Every “email marketing solution” I’ve encountered in the wild is a goddamned monstrosity and I often wonder how the businesses behind these behemoths manage to bamboozle their clients into using their terrible software. I don’t feel that way about MailChimp, however: it’s the one and only email service that’s actually a pleasure to use.
I’ve seen a lot of different CRMs in my day (Zoho, Act On, Constant Contact, and iContact, to name a few) and they’re all really expensive and they all suck. Their interfaces look like they were engineered by alien UX designers who are still learning about human anatomy, they use implementations of TinyMCE from the 1800s, and their tokening system for mail merge values is either nonexistent or needlessly complicated. Creating HTML emails in these systems is often a Sisyphean affair: web editors wrangle hopelessly with pre-generated templates that invariably require custom markup to alter. I see the same campaign cloned over and over again until its mutant descendants are messes of broken tables.
To be fair, a CRM is a complex business application, and delivering emails is only one small part of what it does—the core functionality of a CRM usually involves marketing automation and contact management. This is also why its email delivery mechanism sucks. In the event that you’re stuck with a toothpick in a swordfight, you can still use MailChimp to get the job done. In this article I’d like to show you how to leverage MailChimp’s email designer even when you’re saddled with a different CRM’s tools.
Make Your Template in MailChimp First
Start by using MailChimp’s drag-and-drop email designer to build your HTML email. Look how many you have to choose from!
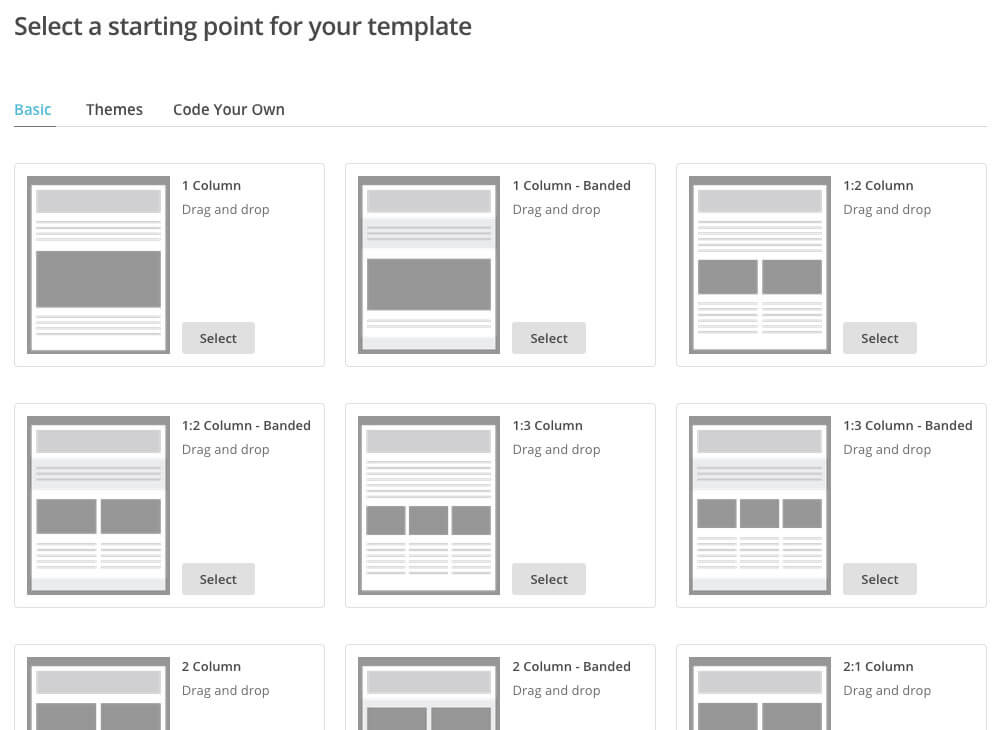
You may want to make your own from scratch, and that’s okay too. I prefer to work with MailChimp’s base templates to start because they’re already cross-client proofed, and work for mobile. If you want to subject yourself to that kind of torture anyway, be my guest. You can always import your custom template into MailChimp via their “Code Your Own” tab.
If you started with a base template from MailChimp, once it looks how you want, save your template and then “Export as HTML.”
Add Your CRM’s Mail Merge Tokens
Your CRM will have its own mail merge tokens for things like |Subject|, |FirstName|, Subscribe/Unsubscribe links, and so on. Figure out what those tokens are, so you can insert them into your MailChimp template where appropriate. We don’t plan to send this email via MailChimp, so we’ll need those tokens in the template for when it goes out via your shitty CRM.
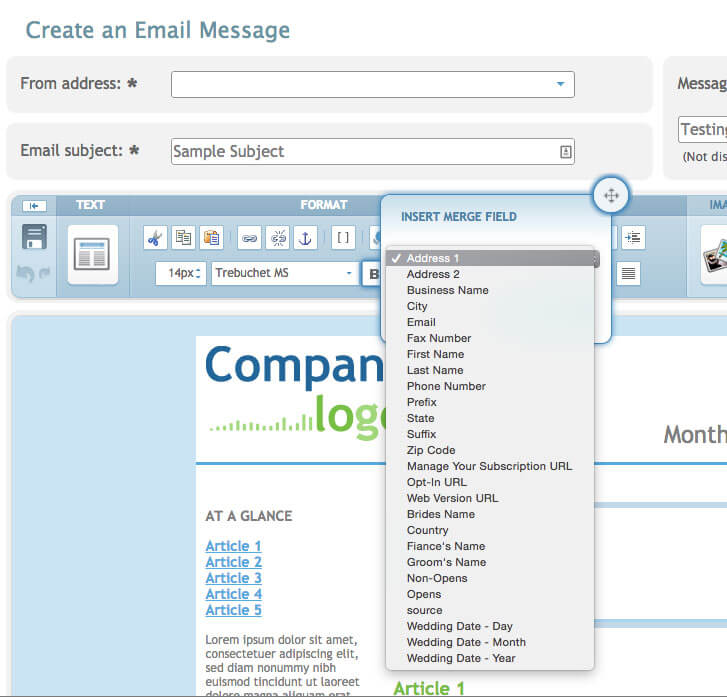
Once you’ve found your mail merge fields:
- Create a new template using the “Code Your Own” tab, and paste in the template you created earlier.
- Switch to “Edit Code” in the Template editor to place your tokens in the code where you want mail merge values to be outputted from your CRM.
- Add MailChimp’s Editable Fields.
MailChimp Editable Fields
Now we need to make the template editable again, so your web editor can abandon your CRM’s horrible visual editor and use MailChimp’s. While in “Edit Code” mode, you can add the attribute “mc:edit” to any containing element whose contents you want your web editor to be able to tinker with. So if you want your web editor to be able to edit some text in a header tag or div, just add “mc:edit” to that header element and MailChimp will magically make that text editable. The full list of editable tags is here: http://templates.mailchimp.com/getting-started/template-language/.
<h1 mc:edit>Hi, this text will be editable!</h1>
Code language: HTML, XML (xml)
You probably want to load image assets from the CRM you spent so much money on rather than this free MailChimp account. In “Edit Code” mode, replace all image assets that won’t change from email to email with static links to those image assets in your CRM.
If you want a web editor to be able to insert images from your CRM on an email by email basis, simply wrap the image block in question in a div with the “mc:edit” attribute. This will expose the image as code, so the web editor can replace the src of the image with the path to it on the CRM. Unfortunately, we can’t just put the “mc:edit” attribute on the img tag itself, because this will cause MailChimp to provide controls for the web editor to upload the asset to MailChimp’s servers:
<div mc:edit>
<a href="#"><img src="[url to asset on your CRM]" alt="My alt text goes here." /></a>
</div>
Code language: HTML, XML (xml)
Import into Your CRM
By now you have an email template with the correct mail merge tokens and all its assets are pointing to your CRM. Your web editor can now log into MailChimp to edit emails instead of your CRM. All she has to do is “Replicate” your template in MailChimp to make changes to it. Then, when she’s done, she can just Export as HTML, and import the HTML file into the CRM’s hideous editor. Just make sure to switch to whatever code mode it allows and paste the contents of the exported MailChimp HTML template in there. Voila!